
Remove eSIM from iPhone: 5 Simple Steps

You might need to remove your eSIM when transferring the eSIM's phone number to another iPhone, changing carriers, clearing unused plans, or if you're selling, trading, or giving away your iPhone.
This article will show you, in 5 simple steps, how to remove an eSIM from your iPhone, making sure it's a straightforward task.
How to remove the eSIM on your iPhone
Keep in mind that an eSIM is built into your iPhone, so it's not something you can physically remove like a traditional SIM card. However, you can remove a phone number associated with an eSIM or transfer it to another phone. Follow these steps to delete an eSIM:
Open the Settings app on your Home screen.
Choose Cellular from the settings options.
Pick the cellular plan you want to delete from your list of SIMs.
Press Delete eSIM.
Confirm the removal by tapping Delete eSIM again.
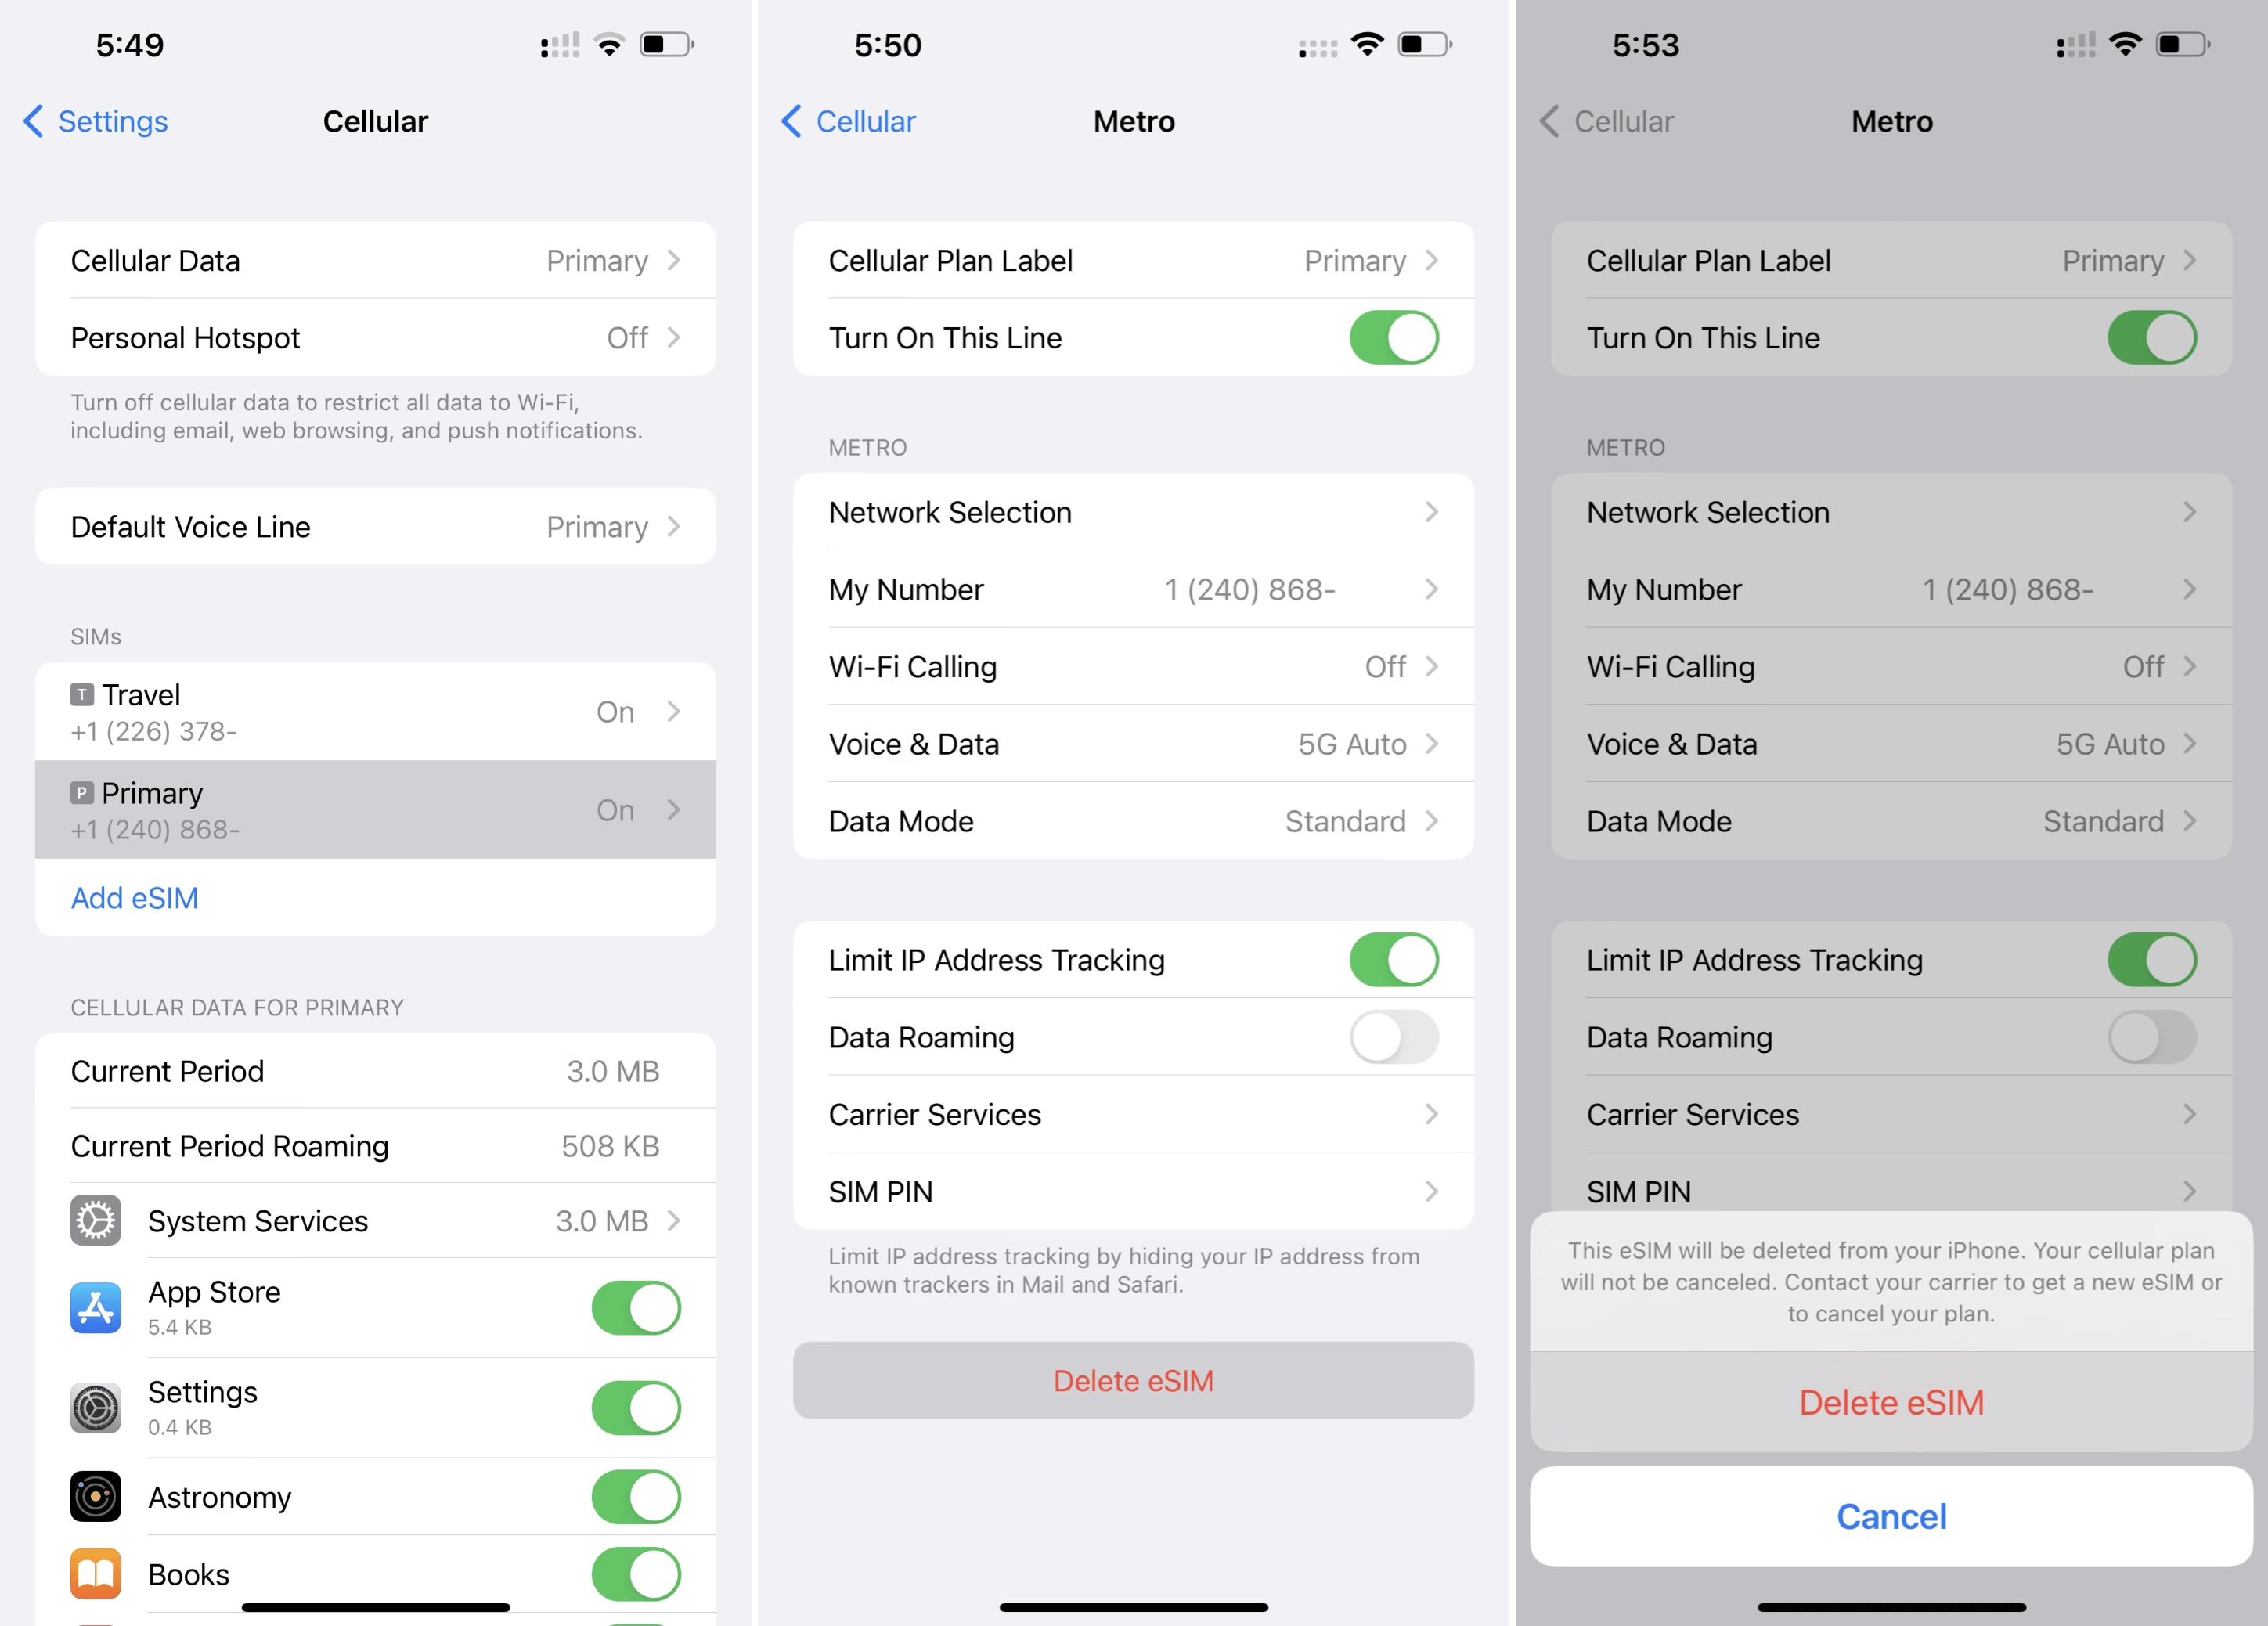
After confirming the removal of your eSIM profile from your iPhone, you have one last step. Go back to the Cellular settings, and tap again on the number you've just deleted.
After you have confirmed that you want to remove the eSIM profile from your iPhone, there’s one more step to take. Once you return to the Cellular settings screen, tap the number that you just removed again.
Tips and considerations about eSIM removal
Removing the eSIM from your phone does not automatically cancel your cellular plan. To terminate or transfer your service, contact your carrier directly.
If you delete your eSIM, you'll need to contact your carrier to get a new one. Then set up your new eSIM.
If you erase all content and settings from your iPhone, you'll have the choice to either remove your eSIM or preserve it.
If you're transferring your number to a new iPhone, activate the eSIM on that new device first before you delete it from the current one.
Avoid deleting your eSIM to troubleshoot issues unless it's recommended by your carrier.
Back Up Your Data
Before you remove the eSIM from your iPhone, it's a good move to back up all your stuff. This is extra important for your contacts, especially if they're saved on the eSIM. Don't forget to back up texts, photos, and any other important info, too.
To save everything to iCloud:
Go to Settings
Tap your name at the top, and hit iCloud.
Then pick iCloud Backup and press “Back Up Now” to start.
If you're not online, you can back up with iTunes on a computer or Finder if you're using a Mac.
Be aware that certain eSIM profiles can't be recovered once you remove them. It's essential to reach out to your carrier before deleting the eSIM to confirm if you can reactivate it or transfer it to a different device later.
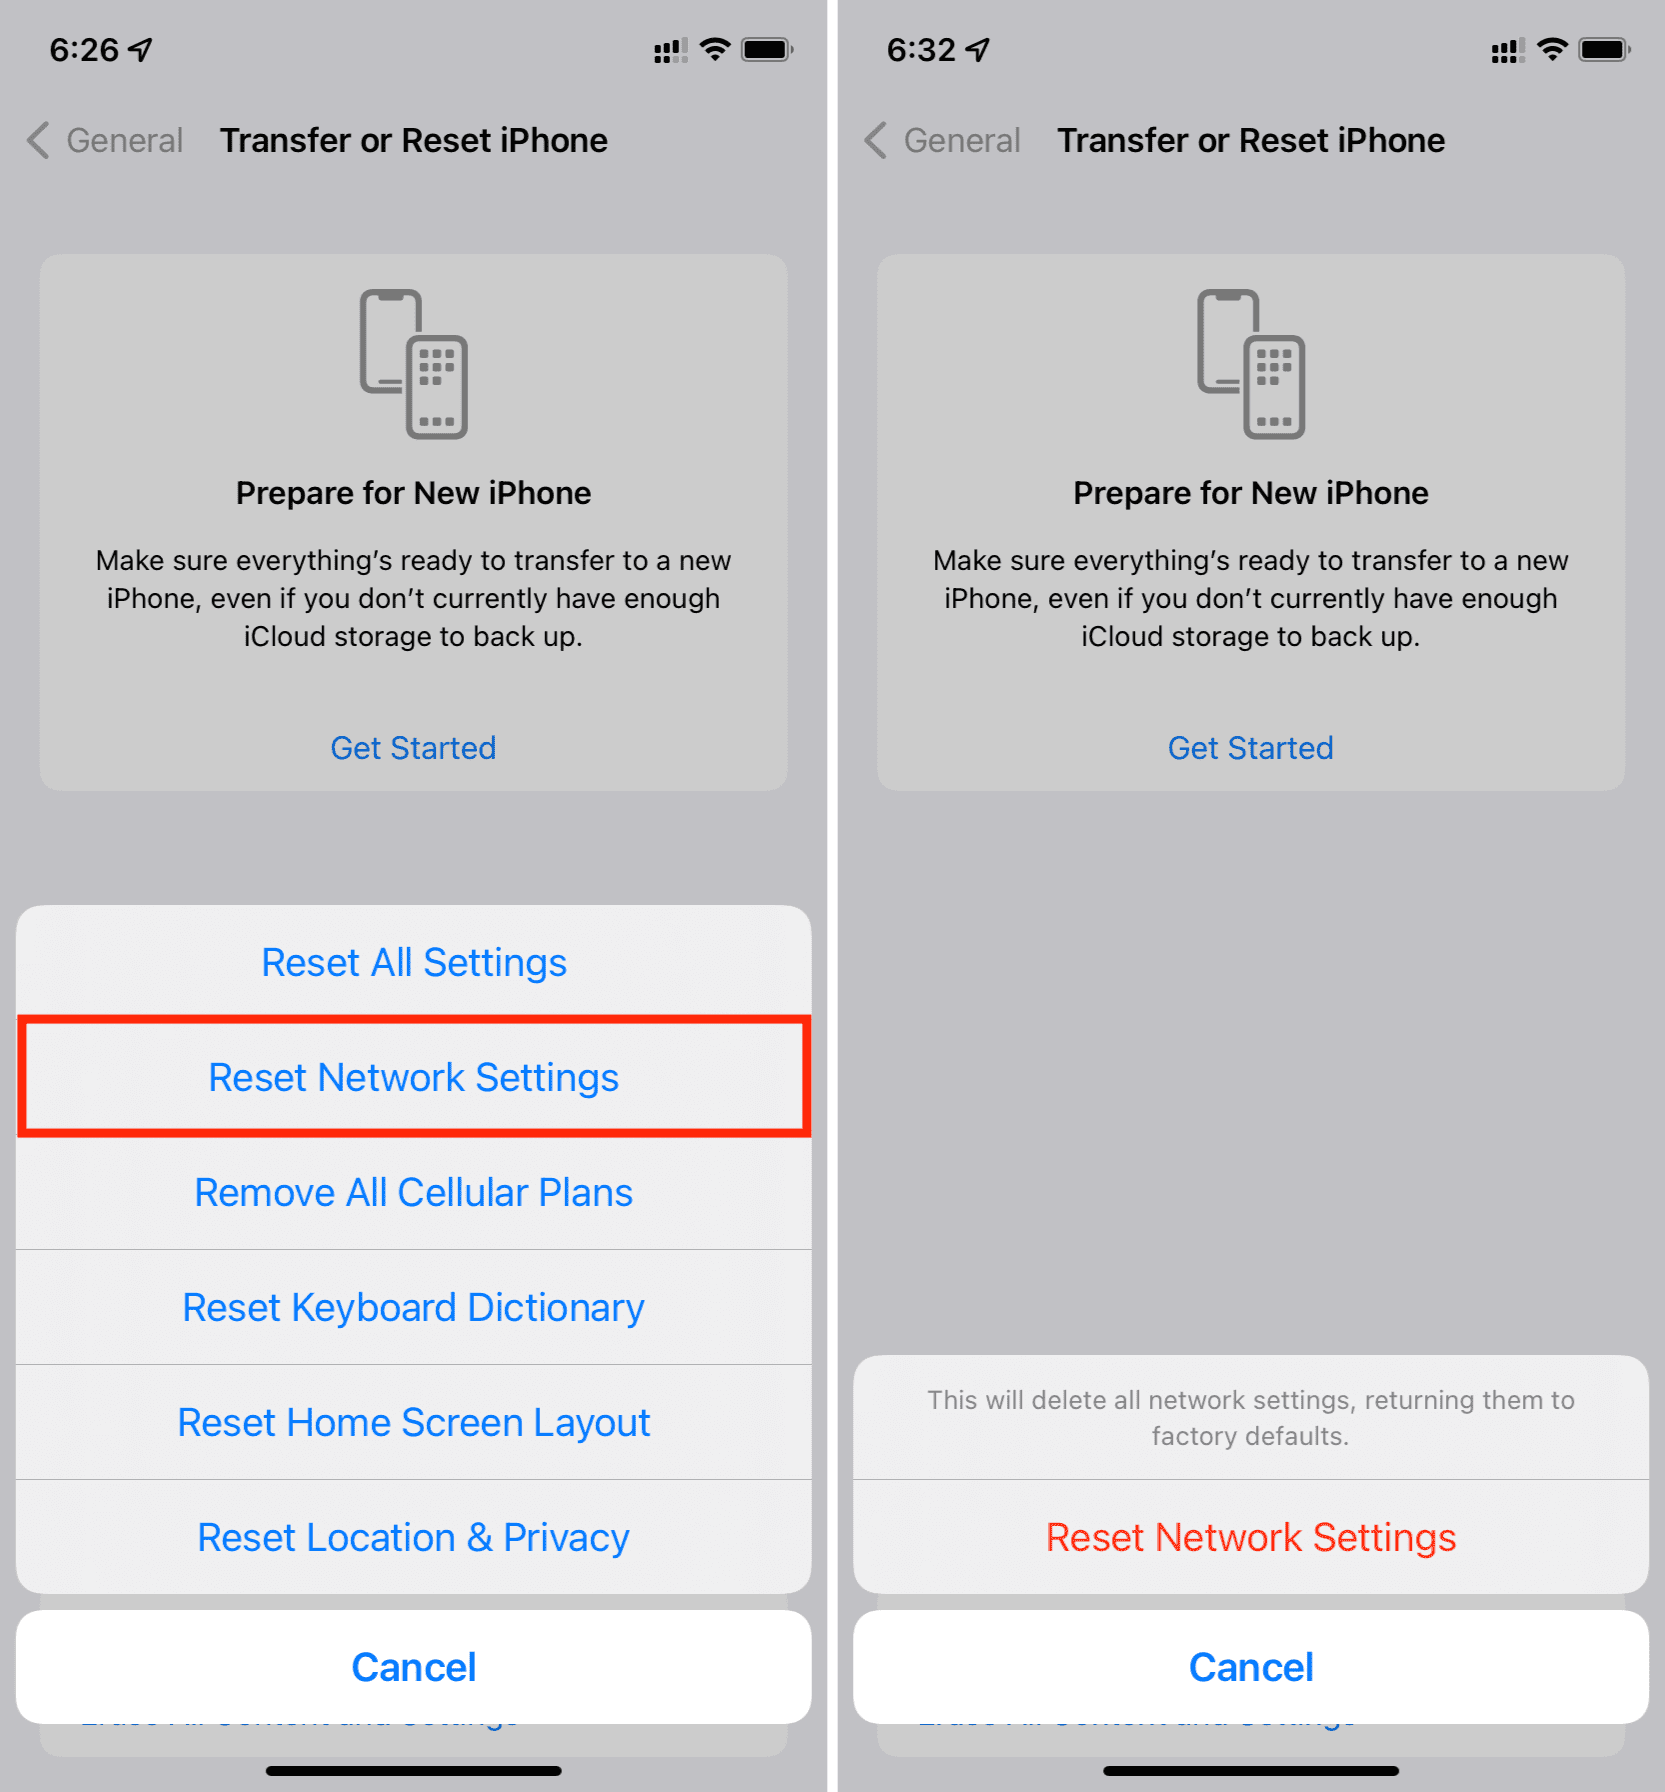
Reset Network Settings (Optional)
For a better network experience after removing your eSIM, you might consider resetting your iPhone's network settings. This can help fix any network problems caused by the removal and help your phone connect well with a new or current SIM card.
Here's how to do it:
Head to [Settings], then [General], and look for [Reset] or [Transfer].
Tap “Reset Network Settings.” If asked, enter your passcode to start the reset.
Final thoughts
This guide walked you through the process of deleting an eSIM from your iPhone, using the 5 easy steps provided within your Settings app. Don't forget to apply the helpful hints we've offered to ensure a trouble-free experience after your eSIM removal.